My Media Library
Contents
My Media Library
The learnIT Media library is the main way for you to interact with your video library. It contains all videos you have access to, whether you are the owner of the video, a co-collaborate or the video has been shared with you for viewing only - your affiliation with any given video is displayed to you on each video entry as well as its published state: Private or Published. Private meaning the video is only accessible to you and potential co-creators/viewers and Published meaning it has been published to a Course and students have access to the video.
From the overview, you are able to search or use filters in order to drill down and locate your specific videos based on many different criteria. Once located, you are able to easily edit the entry/entries, delete it/them, or publish to courses.
Editing an Entry
You can edit any entry that you are the owner of, and any video that you are a collaborator on. By clicking on the pencil-icon next to a video you can update a range of settings. There are eight different tabs with settings:
Upload & Record
When you want to add a new video to LearnIT you have different ways of doing so. If you have a video file ready you can simply upload it. But when you're about to record a video LearnIT Video has a variety of tools you can also use to do this.
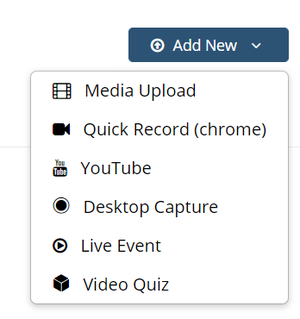
Adding new videos is done by clicking the "Add New" button from your media library and selecting the method you need.
- Media Upload is a straight forward upload, where you can upload a video file (a MP4, MOV, AVI etc.) from your computer.
- Desktop Capture allows you to use the "Kaltura Capture" software package to record your webcam and/or screen directly on your computer. With some advanced features, such as the opportunity to allow viewers to see both your webcam and screen recording at the same time.
- Quick Record allows you to record simple videos without leaving your browser, please note that this currently only works in Google Chrome.
Publishing
You have to ways of granting other people access to your videos in learnIT Media. Either you add people to the actual video by using the Collaboration tab or you can publish your video to one of your courses or a Shared Repository.
Publish to course
Select a video from your Media Library using the checkbox to the left of the video and select Actions > Publish.
If the video is private, you will have to select Published. Now a list of all your courses appear. Search for the course you want to publish the video to. This list might be fairly long, so use CTRL+F or COMMAND+F to search for the course. Once you have selected a course or several courses, hit save and the video will appear in that/those course(s)' Course Media area.
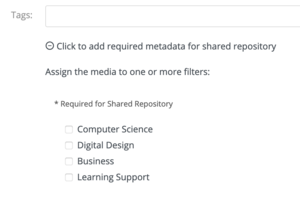
Shared Repositories is a way to share videos that might be usable for other colleagues and courses at the ITU. In order to start sharing a video, you have to select a category for the video and the categories are divided into the various educational tracks at ITU; Computer Science, Data Science, Business and Digital Design. You need to edit the details of your video and add it to the category of your choosing.
Once you have added the video to a category, choose save, and select Shared Repository from the Publishing interface. (For details look at Publishing Videos
Please make sure to only share videos featuring yourself or people that have allowed you to share the video. Videos containing students should never be shared in a shared repository.


