LearnIT Media/Editing an Entry
Contents
Editing an Entry
This page is about editing the settings of a video, if you're interested in editing the content of a video then see the page The Video Editor (Launch Editor)
You can edit any entry that you are the owner of, and any video that you are a collaborator on. By clicking on the pencil-icon next to a video you can update a range of settings. There are eight different tabs with settings:
Details
As the Owner or Co-Editor of a video you can edit the metadata of the video, in addition to the title and description you have the opportunity to add tags that can be used when filtering your library. With the 'Publishing Schedule' you can limit the availability of a video
Options
Here you can change a few settings regarding features such as comments and clipping. In general these functionalities is not really relevant for the use in LearnIT.
Collaboration
You can transfer ownership to any other user (note: a video can have only one owner, so you will lose access to the video). Or give another user collaboration-rights while staying the owner. There are three different levels of collaboration:
- Co-Viewers - are able to view media even if it's not published in a course (yet), but do not have editing or publishing permissions.
- Co-Publishers - can publish the video to their own courses, but cannot change anything.
- Co-Editors - can edit the video's metadata, edit and replace the video, edit captions, edit chapters and edit slides. Co-editors cannot delete media or add new co-editors and co-publishers.
Giving other users access
- Locate the video you want to give your colleague access in your Media Library
- "Edit" the video's settings by clicking on the pencil-icon
- Select the "Collaboration"-tab
- Under Media Owner you can transfer all access rights to another user, Note that you will lose access to the video yourself since a video can have only a single owner
- Under Media Collaborators you can give any user rights to use the video. In most cases you would give the user "Co-Publisher" rights. You can read more about collaboration rights
- You can search for one or more users by their full name, or ITU username (e-mail address)
- Please note that users will only appear in the list once they have logged in to learnIT Media. If the user you want to give added rights to does not appear, ask them to sign into learnIT Media directly via this link.
- Click add and the users will have editing rights to the video, in the same tabs you can always revoke any rights you've given out.
Thumbnail
As the Owner or Co-Editor of a video you can select the thumbnail (preview picture) of a video. You can either upload a custom image to be used, capture the current view of the player as the thumbnail, or select from an autogenerated set of thumbnails.
Download
As the Owner or Co-Editor of a video you can enable the option to download video file. You can select which of the "flavors" of the file you want people to be able to download; Source (original file and probably the largest version), 1080p (HD resolution), or 720p (low HD resolution).
Captions
As the Owner or Co-Editor of a video you can edit or upload captions (subtitles) for a video. .SRT and .DFXP file formats are supported.
Attachment
As the Owner or Co-Editor of a video you can upload attachments (such as a slide-deck or relevant reading material), that belong to the video. In general this functionality is not really relevant for the use in LearnIT.
Timeline
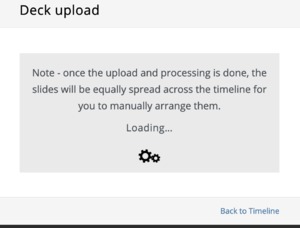
As the Owner or Co-Editor of a video you can edit the timeline of a video, this allows you to create chapters (which can aid navigation in longer videos). By uploading a slidedeck (as .PDF, .PPT or .PPTX) you can align the slides with the relevant section in the video. This will allow viewers to switch between the video and high resolution pictures of the relevant slide during playback.
When uploading a full slide deck, all PowerPoint slides will be distributed evenly across the timeline of the video. Afterwards, you can manually adjust the location of each slide and synchronize them with the video. All text within the slides will be added to textboxes that will be searchable, which is a great way to locate a specific topic.
